VPS Connection Guide
How to connect to your VPS from a Windows PC
This guide is designed to help provide instruction on how to access your VPS server from a Windows Computer, please follow the instructions below:
Direct Connect Instructions
The version 1.12 release introduced a new Connect To VPS button directly on the VPS overview page. This button will automatically download an RDP file.

If you click on the downloaded file, you will likely see a browser security warning. Agree that the download is from a trusted source and then connect.
Check the box for 'Don't ask me again for connections to this computer'
Once this is connected and in place, you can directly access your VPS without needing to use your PC's Remote Desktop Connection.

Non-Direct Instructions
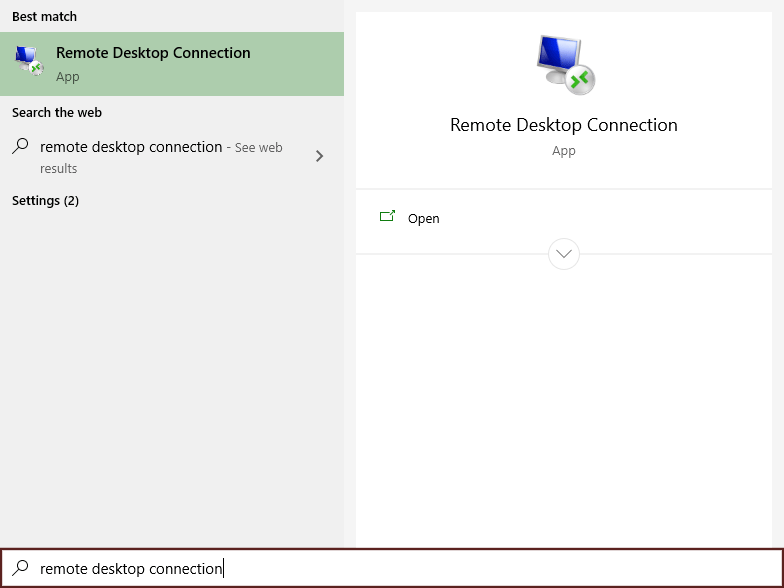
Step 1. Windows comes with a built-in app for remote connections. To open it, click Start, type “Remote Desktop Connection” in the search bar, and select it from the results.
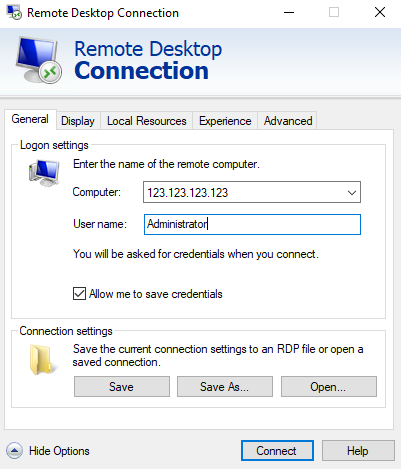
Step 2. Under Computer enter your IP Address that is found in the Control Panel.

Step 3. Click Show Options
Step 4. Under User name enter the username that is found in the Control Panel.
Where to find VPS Login info
Login to your CrossTrade VPS account via https://app.crosstrade.io/user/vps
From Overview, Scroll down to "Connection Details". Additionally, the connection details are emailed to you upon purchase.

3. Click on the IP Address, Username, and Password copy buttons📄and then add them to your RDP connection
Step 5. Optionally, check the “Allow me to save credentials” box to save your login details and avoid re-entering the password for future connections.
Step 6. Click “Connect.”
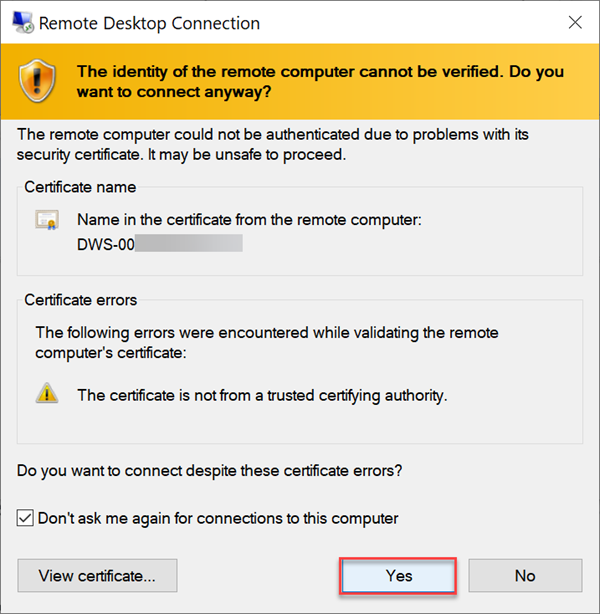
You may get prompted about an unknown certificate if your computer has never connected before– click yes to proceed.
Step 7. Enter the server password provided in the email

Step 8. If you skipped step 5, you can save the credentials now by checking “Remember Me.” If you selected the option earlier, “Remember Me” will already be preselected.
Last Step. Click “OK” to connect to the server. 🚀
And that's it! The desktop is already set up and ready to go with the latest NinjaTrader 8 install plus the CrossTrade Add-On!

Changing Default Password
The password you see on the dashboard is just the default we provide so you can get access. You can change it on the VPS as you would any other Windows machine. Windows button > Search > change password

Connecting via Mobile App
On your Android or IOS device, navigate to the Google Play or Apple App Store and download the Windows App by Microsoft.

Once downloaded and open, click PC Connection

Add your VPS IP Address at the top under PC Name.

Under User Account click Add User Account.
Username: Administrator Password: (your VPS password)

Optional - Provide a Friendly Name for organizational purposes (e.g. My CrossTrade VPS)

Click Save.
On the Certificate screen, you can check the box for 'Never ask again for connections to this PC' if you would prefer to circumvent the login process moving forward.

Once you click Connect you will have access to your VPS from your mobile device!

Troubleshooting Connection Issues
If you experience issues connecting to your VPS, try the following: 🔹 Check Internet Connection – Ensure your internet is stable. 🔹 Verify IP & Credentials – Double-check the details from your VPS provider. 🔹 Disable Firewall Restrictions – Some security settings may block connections. 🔹 Allow RDP Access – Ensure Remote Desktop is enabled on the VPS.
For more information, you can refer to Microsoft's official documentation on getting started with the Windows App
Last updated